|
|
|
|
|

|
Nitrozac's Mac O'Lantern Tutorial!
You saw the amazing Mac O'Lanterns, and our scary Zuck o' Lantern. Now build one of your own! Nitrozac shows you how...
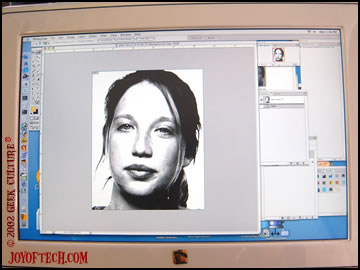
Step One:
Next, you're going to divide the image into areas of white, grey, and black. Trace the outside edges of the pure white areas on your image. Theses are the areas that you will carve completely out. Be sure there is nothing inside the white areas or else it will be unsupported! With another color, draw a line between the black and gray areas. Sometimes it's hard to decide where the line should go, but do your best, you can always tweak a bit during the carving stage. The pattern will start to look like a topographical map, cool! Draw a circle-like shape on the top of the pumpkin to mark where to cut out the top. Make the circle more towards the back, so it will leave ample space for your carving on the front, yet enough room for your hand to reach inside the pumpkin. Pull out the insides onto a sheet of newspaper, and get out as much with your hand as possible. Then, take a large spoon, or a scooper like the one in a Pumpkin Carving Kit (available in grocery store with the pumpkins), and scrape it as clean as possible. Trim off the lid's junk with a knife. Wrap up the insides ASAP and toss in the garbage or compost or else it will return to haunt you. Tape the pattern on the pumpkin, making little folds on the edges to compensate for the roundness of the pumpkin, and the flatness of the paper. Snaggy completely taped his Ballmer pattern on the pumpkin with packing tape, and I think that worked very well. Use a pushpin or sharp knife to poke as many holes as you can, following the lines around the white and gray areas. Don't get too sidetracked on developing the perfect pumpkin hole poker and daydream of cashing in on patents, -Snaggy is way ahead of you ;). But I don't recommend using the hole poker in the carving kit, it's useless. Just make sure the holes are big enough to see them clearly, or you will have wasted a ton of poking time. Don't be lazy, and keep poking holes no matter how long it's taking. This is the most important part of the carving, and if you're not diligent, you'll be confused and scared when you peel off the pattern as you can't tell what the heck it is you're supposed to cut out, peel, or leave alone! You may be surprised at the monotony of this task, so it might help to watch TV at the same time, or force a friend to carve one out at the same time. (Hmmm, the perfect pre-Halloween date?) Resolve to yourself that this project is going to take a bit of time, but it will be worth it in the end. It is a great way to spend the evening. |
 If you are using one of our patterns, you can go straight to step three. If you want to try someone else's portrait, start at step one.
 Step Two:
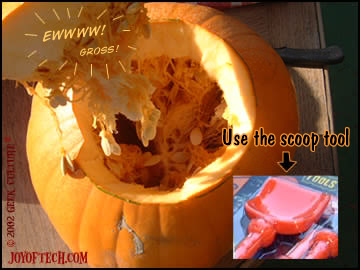 Step Three:
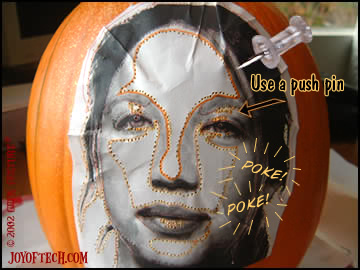 Step Four:

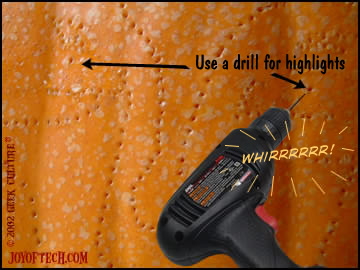 Step Five: Step Five:Optional. If you have a drill, drill two holes in the highlights of the eyes. Use a small bit, and drill right through the pumpkin. This will give your portrait a sparkle in their eyes once the carving is finished. Do it now, as it would be extremely difficult to drill a hole in a dangling piece of pumpkin eye if you wait until the end. Now you've finished poking holes, and peeled off the pattern, and it should look something like this... a pumpkin with a pore problem. Hopefully you can easily make out the design. |
 Step Six: Step Six: Shown here are the tools I used to carve the pumpkins. I highly recommend you use wood carving tools. Don't be cheap. Get these $13.00 tools, otherwise you'll be struggling with those cheap little $2.00 carving tools. These wood carving tools are like the Macs of the carving tools and those cheap dollar store ones are like the PC clones. ;) Select a straight edge tool and gently slice the pumpkin skin around the white areas, and gray areas. Peel off the white areas only for now. It's a good idea to print out a second copy of the design, so you can reference it as you carve the pumpkin. |
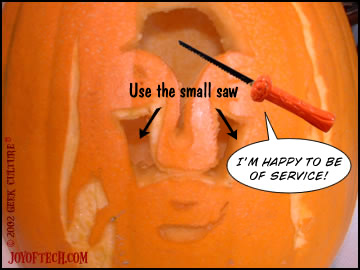 Step Seven: Step Seven:Depending on your subject, you may want to cut all the way through, or not cut all the way through. Cutting all the way through will leave very bright areas, so in recent years I've been not cutting all the way through. That leaves more options for subtle shading. The more you remove, the brighter the image area. You can always cut all the way later on in the process. If you are cutting all the way through, take a very fine serrated knife, or the small saw in the pumpkin carving kit and completely carve out the white areas. This tool is great because it's dull-ish and creates mushy edges which add a soft touch to the carving. You may need to use the drill again for other highlights such as the small areas on the bottom lip. Keep your head on, and try not to overcut into other areas. |
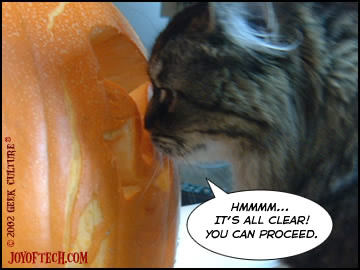 Uh Oh! Uh Oh!
Surprise inspection by NitroKitty! |
Onward to Part 2 of the Tutorial!
You love our Mac-O'Lanterns, now love our t-shirts, beanies, and more!
 Cool Shirts! |
 Geekier than thou! |
 Nitrozac's painting on shirts and more! |
 Tubes Rock t-shirts! |
Help keep the joy in Joy of Tech...tip the cartoonists!
Become a SuperFan! | This month's total | Donation FAQ
