|
|
Adventures of the "Homebake Club"
Re-creating the Smithsonian Apple I, ... in cake!
This year marks the 30th anniversary of Apple Computer... something Mac geeks around the world are celebrating. And if Apple isn't going to celebrate their 30th birthday with a special event and new products, we here at the Joy of Tech figured we'd just have to release something ourselves!
So, following the birthday tradition, we decided to bake something, but as this is Apple's 30th birthday, (quite an achievement), we knew it would have to be something insanely great. Our mission was daunting, but then inspiration struck... what better cake to build than that of the Apple I that now resides in the Smithsonian Institute?
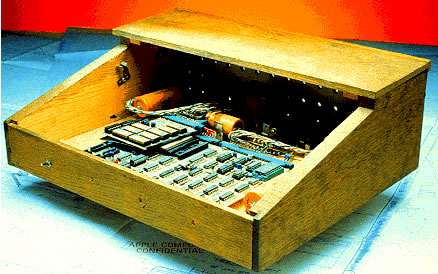
The Smithsonian Institute's Apple I
A Byte of History
Steve Wozniak designed the Apple I in 1976. It was a kit computer... that is, users bought the workings and built their own wooden case. They also had to buy a couple of transformers at Radio Shack for the power needs, and a keyboard. I have always wondered who built the Smithsonian's Apple I case, so I asked Woz about it. He explained...
"That is the wooden box that was made for me by Randy Wigginton's father. Randy was a high-schooler when I met him at the Homebrew Computer Club. Being so young, he saw the advantages of the Apple ][. I actually helped Randy build an Apple ][ for himself long before we even decided to start a partnership to make PC boards.
Randy's father made these wooden cases for the Byte Shop to sell with Apple I boards, as I recall, but he didn't make very many in total."
Randy Wigginton went on to become Apple employee #6, and his dad's wooden case ended up in the Smithsonian! Incidentally, the other computer you often see mentioned on Apple history sites is this one... one that we like to call the "school desk" Apple...
Woz describes it so..."This is the first one. This is it exactly. This is my hand-wired prototype, not a real Apple I or Apple ][ PC board. There are 4 white 2KB EPROMs on the upper board - that's how I developed BASIC and all the other routines of the Apple I. This is an Apple ][ prototype. I can tell by how few chips it is. The Apple I had a computer board attached to my video terminal board, in the prototype stage."
OK, so now that you know a little bit about the original Apples, lets put on our Cake Engineer's caps and get baking an edible replica!
Building the Apple geek's dream cake.
First off, assemble all the supplies needed:
- 1 large Lindt Swiss Classic chocolate bar
- An awl.
- Baking supplies such as flour, baking powder, salt, sugar, oil, eggs, milk, vanilla or cocoa, at least one 9x12" baking pan, mixing bowls, spatula, wooden spoons, hand mixer, oven mitts, large knife.
- 2 cans of vanilla icing and 1 can of chocolate icing.
- 1 tube white decorating icing with icing tip attachments.
- Icing knife, (other utensils can be used in a pinch.)
- 1 Dark chocolate KitKat bar.
- 1 Cadbury Burnt Almond chocolate bar.
- 1 package Dentyne Mints.
- 1 fine tipped permanent marker.
- Pack of TicTacs
- 1 pack Wrigley's gum.
- 30 birthday candles.
- matches.
- wax paper, plastic wrap.
Step #1, The Carved BackBoard
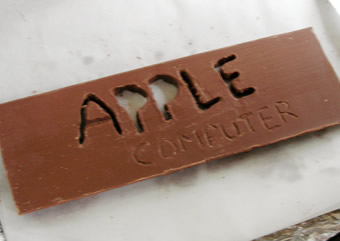
Perhaps the most challenging aspect of this cake was re-creating the crafty wooden backboard with the words "Apple Computer" carved into it. We love a culinary challenge, so we decide to make this part of the cake first. That way, if it proved impossible, we could always just cook up a few iPod cupcakes. :-D
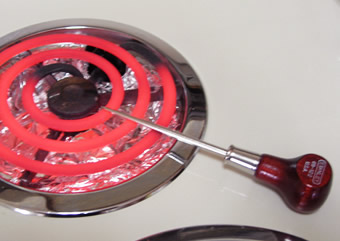
For the backboard's structure, we used a large Lindt Swiss Classic chocolate bar. It was the right size and proportion, and also thick enough to withstand the carving process. Snaggy carved the "Apple" letters out of the chocolate using a "hot knives" method... an awl was heated on a stove element, then carefully and gently pushed though the back of the chocolate bar.
This takes time and patience, and you'll have to wipe off the awl repeatedly and reheat it a number of times, but it does the job nicely. To make things easier, you may want to lightly scratch the pattern of the words in the bar before you start awling.
The word "computer" doesn't have to be melted all the way through, it can be gently carved with a knife. It might be a good idea to buy a second chocolate bar as a back-up in case something goes wrong with the first one, especially if you like chocolate. :-)
For the electrical outlets that are mounted on the backboard, we used two squares of a Cadbury Burnt Almond bar. To attach it to the Lindt chocolate, we gently melted the back of the Burnt Almond squares with a heated spoon, and fused it to the milk chocolate piece. Getting hungry yet??
Step #3: Baking!
The Smithsonian Apple I is a fairly large object. Although our cake isn't exactly to scale, we still needed a LOT of cake volume to create it.
We baked four, 9"x12" cakes. Nitrozac used the "White Cupcake" recipe from Robin Hood. You can use your favorite cake recipe, or one of those pre-made mixes from the grocery store, it's up to you. If you are going for authenticity, we recommend you not bake a chocolate cake. Why? We'll let you in on a little-known Apple creator tidbit.... Woz does not like chocolate cake.
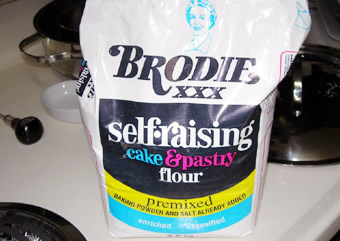
The SeXXXiest flour we could find!
Try to bake these cakes several hours before icing, in order to allow them to cool completely. If you ice a cake too soon, while it's still warm, the icing will melt and the cake will become a hideous blob of unappetizing goo. Not good.
|
|